Remember that
inspiration picture I posted a while ago, the one that "summed up the wedding" but wasn't sure why? Well, thank you Inspirational Picture #37, because we're using mason jars on the big day!
I've been seeing these jar lanterns everywhere, but couldn't find a good set of instructions. So, I made up my mind to sit down and figure it out. Here are my GOOD instructions. Enjoy.
First, I set out for Good will to procure some mason jars. Goodwill did not disapoint! 8 various mason jars for 50 cents a peice! Then it was off to the craft store for some heavy gaged wire. I found silver wire at about a 20 gage, which turned out to be perfect.

The tough part about the project as a whole is keeping the wire from kinking. I attempted several methods, including wiring straight onto the jar (miserable), and coiling two wires together by hand (even worse). Then I had it...why not braid the wire into a loop? AND put that loop on something to keep it from kinking? Boom, roasted, I got it! I nailed a picture nail into the desk top (cheap desk) and was able to loop the wire around it.

As for the length of the wire, it should be 3-4 feet. I folded the whole length in half and twisted the uncut end once to make a loop. Then, placing the loop on the nail, I twisted the halves together neatly. It gets hard to twist them neatly at the end, so i clipped off the last half inch or so for a clean end. I wrapped the twisted wire around the first jar, making sure to place the wire at the narrowest part. Some jars have a dip below where the lid screws on, thats the ideal place. For the jars that don't have that dip, I wrapped the wire where the lid screws on. Its easy, then, to simply thread the cut end of the wire through the loop and pull tight. Be sure to leave a good amount of slack for making the handle.

I pulled the slack wire to the opposite side of the looped end, and kinked it, making the beginnings of another loop on that side. Then twist several times until the wire is completely tight around the jar, but also so that the new loop is big enough to thread the cut end of the wire through it.

Then I pulled the cut end through the new loop until I had the desired length of handle at the top. To secure it, wrap the cut end aound the loop several time and trim the end.

Lastly, I poured some sand into the jar and pushed a candle deep down into it. The result is dramatic...and easy.

 I doubt there will be any blooming branches aroudn in October. Right?
 They'd have to be green. Or Blue. Or grey.
 Pretty! Pretty expensive.
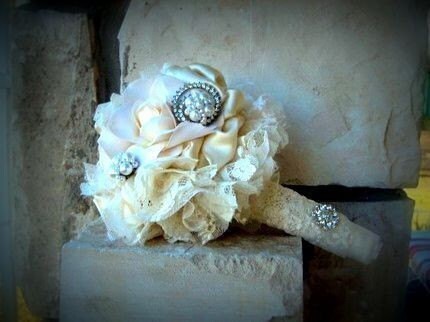


 I have just basted the second leaf on the front and interfacing on the back. Without the interfacing, the stitches would pull. Pulling=crappy result. These two leaf bunches are the largest pieces to embroider. After I get these down, its a bunch of small letters and leaf bunches.
  My goal is to have the second leaf bunch done by next Wednesday. We'll see!
 Isn't it sweet? Just silk leaves, feathers and a broach. I wanted to have something similar (and cheaper) for the wedding. I compiled velvet leaves, silver and dark grey, grey Russian veiling, some stiff felt, grey and blue hackle feathers and thread.
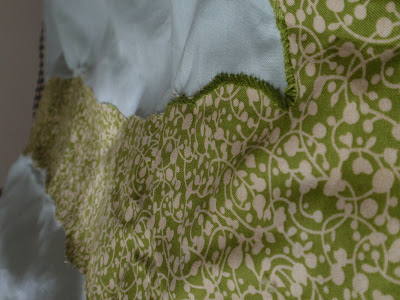
  I sewed the leaves in several layers, making sure to leave space around the sides to allow for the addition of feathers later. Here's a few more layers:


 More projects to come.


 It's the most important Sh'ma, or prayer in Judaism. In doing some of these more nontraditional ideas in our wedding, Tay and I are hoping to take the glory of the ceremony away from us and put it back on G-d. I think using this sh'ma as our Chuppah topper is a great way to work toward that goal. Plus, it's beautiful, isn't it? I've created a design around it that will incorporate our parents and wedding party as well. There will be scroll work around the sh'ma where they can write down scriptures and words of encouragement- Tay's idea.
 .....This is going to take a while.


